 |
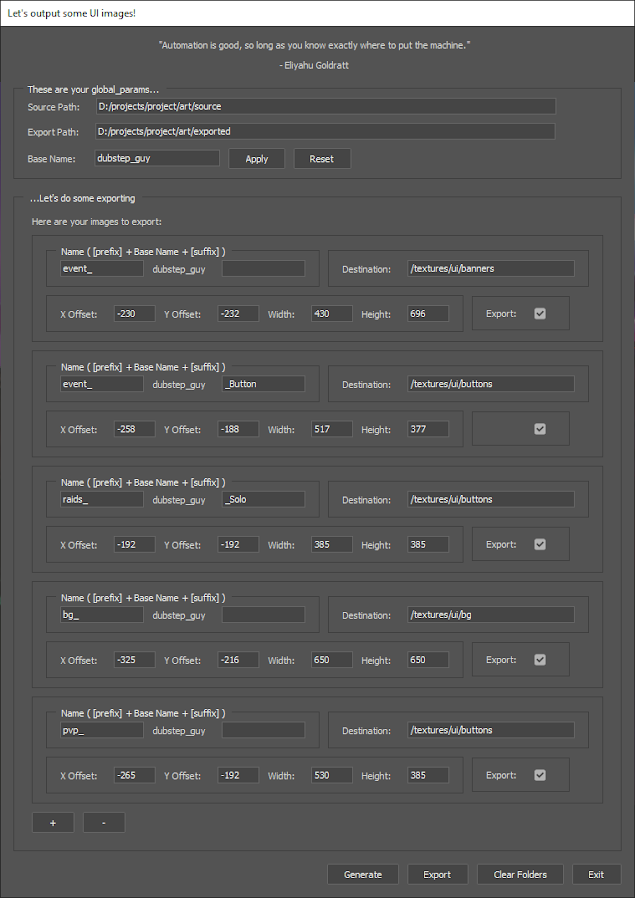
| The UI Image Exporter main interface |
What is it?
The UI image exporter is a photoshop script that allows artists to take a master image and cut it up into smaller subsections based on user defined profiles, for the purpose of making UI elements such as portraits, buttons, and backgrounds with required dimensions. Before exporting, It allows the artist to edit the subimages in any way they wish in the same document. The script will remember and store changes to the export profiles per master image.
Why is it helpful?
The script is intended not only as a tool to export multiple images from a master image, but also to help with managing the process of editing many output files. The script will create folders that mask out the correct dimensions, and the contents of each folder are customizable by the artist like any other photoshop document.
What’s cool about it, technically?
The script has a partially dynamic UI. It generates UI entries for each output profile, and profiles can be added and removed in the UI. So, the script can work with as few as one output profile, or as many as you need.
The script also works out its cropping dimensions based on a user defined point of interest (POI). The user nominates a POI using a photoshop layer and a brush stroke, and the script will focus on that area when it’s doing its cropping.
The script also works out its cropping dimensions based on a user defined point of interest (POI). The user nominates a POI using a photoshop layer and a brush stroke, and the script will focus on that area when it’s doing its cropping.
How do I use it?
Run the script in photoshop using whatever method you wish. Depending on the state of the master image, it will help you set up your document with the right layers, and then it will show you the UI. This is usually accomplished by running the same script a few times, since you can’t do any editing in photoshop while scripts are running.
First time running
If the document doesn’t have a POI layer set up, then the script will make one for you and ask you to put a mark where the POI should be. If that all goes well, then you can run the script again and it will load the GUI.
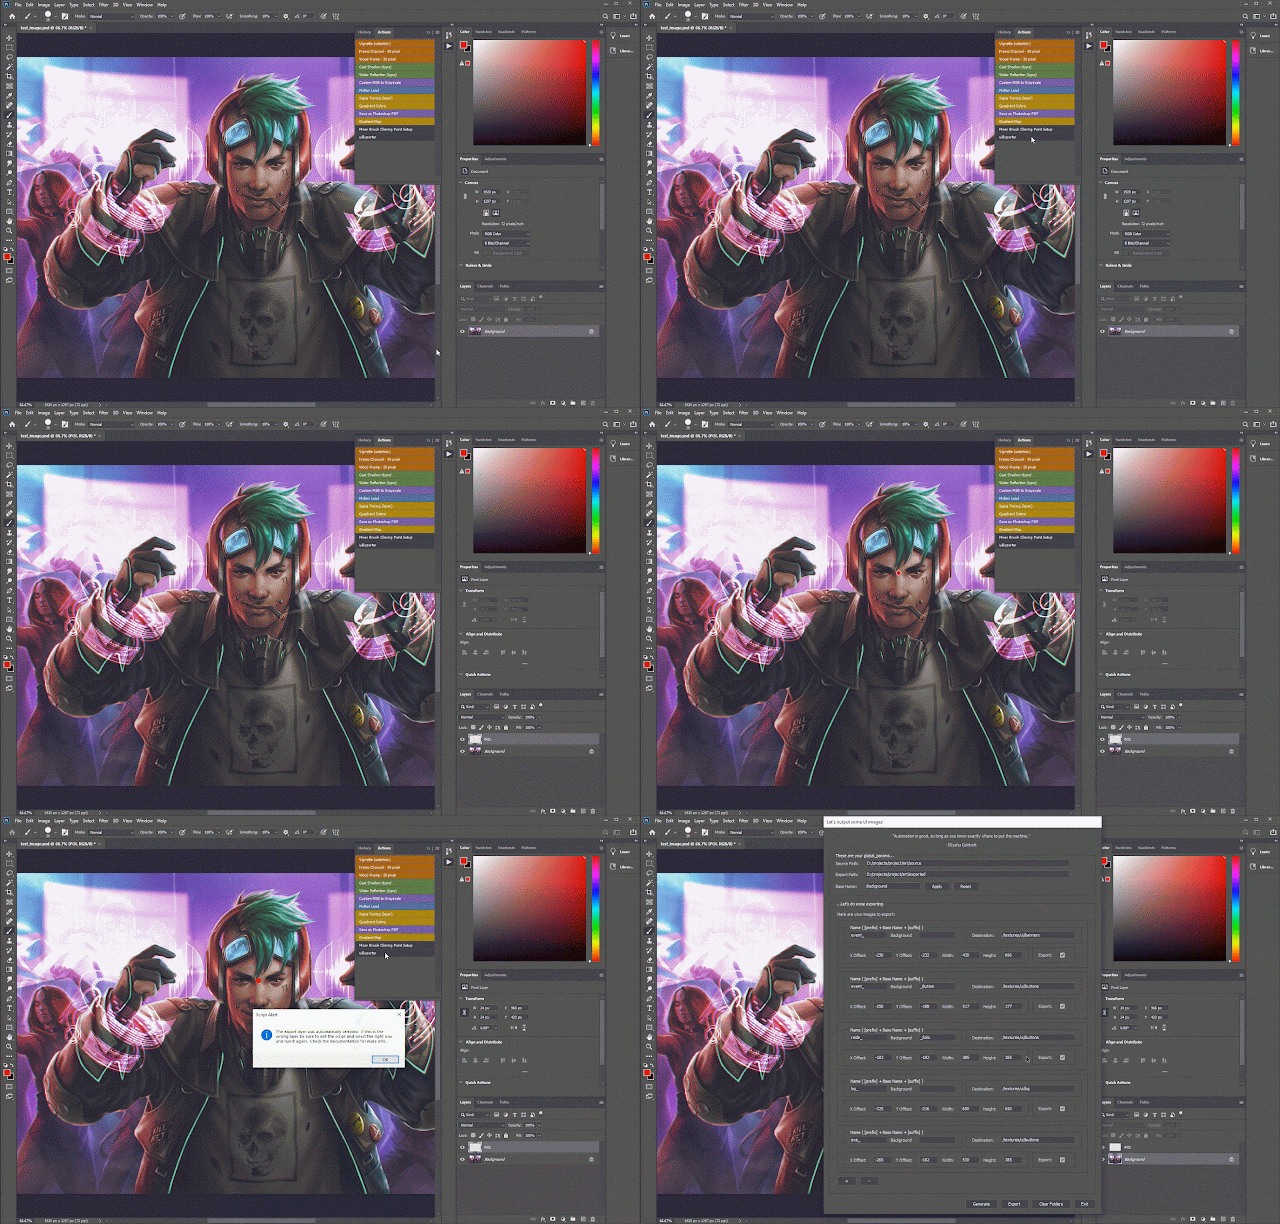 |
| The script will create a layer called POI for you. Place a mark and restart the script. |
Second time running
When you run the script with a POI layer, the GUI will appear and you will see three main sections.Global Params
 |
| The global params are at the top of the UI, under the 'quote of the day'. |
At the top of the UI there are the global params. The first two paths are assumed to already exist. The paths are to the base folder for source art and exported art, ostensibly in some kind of file versioning workspace.
 |
| Changing the base name and hitting apply updates all export profiles. |
Under the paths is a base name. This is the base name of the textures that will be generated ie. prefix_basename_suffix.png. The base name to start will be the name of the art layer (likely layer 1). Changing the base name and hitting apply will update the export name and the current config. Hitting reset will reset the below export profiles to whatever is in the current config, so any changes in those profiles in the ui will be lost.
Export Profiles
Below that is a box of export profiles. Each profile has text boxes for a file name prefix, suffix, and export destination, offsets relative to the POI position, target ui element dimensions, and an export checkbox. These details would normally be decided on ahead of time, but they can be edited in the UI, and the settings are saved out alongside the psd.Profiles can be added and removed using the [+] and [-] buttons below.
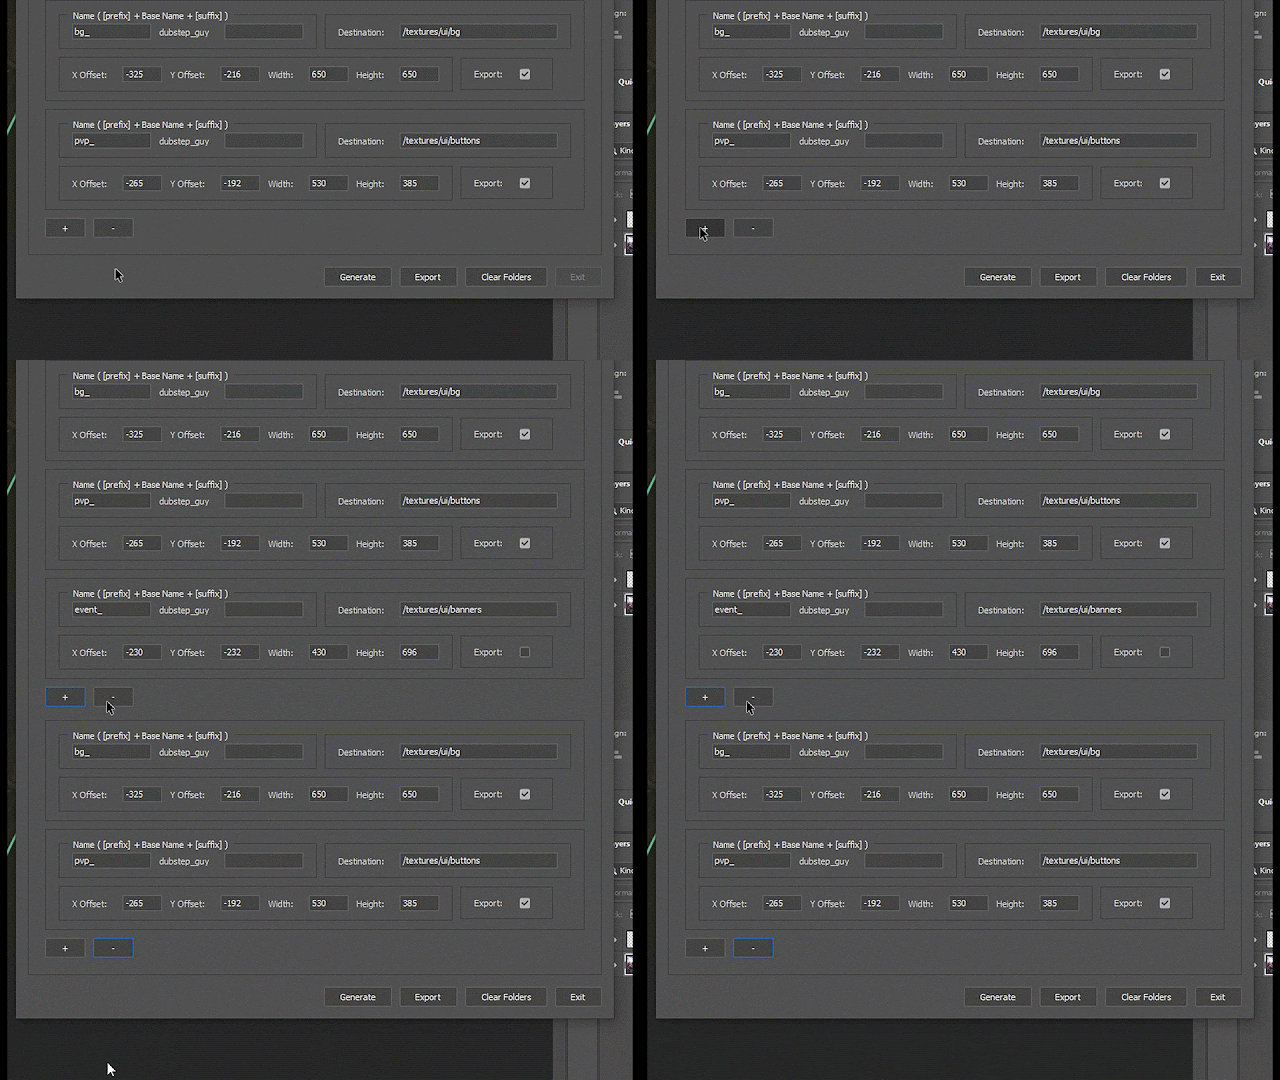 |
| You can add and remove profiles dynamically. |
Script Functions Buttons
 |
| The business end of the UI. |
At the bottom there are 4 buttons to activate script functions. The generate button will generate photoshop folders and masks based on the specifications of each export profile.
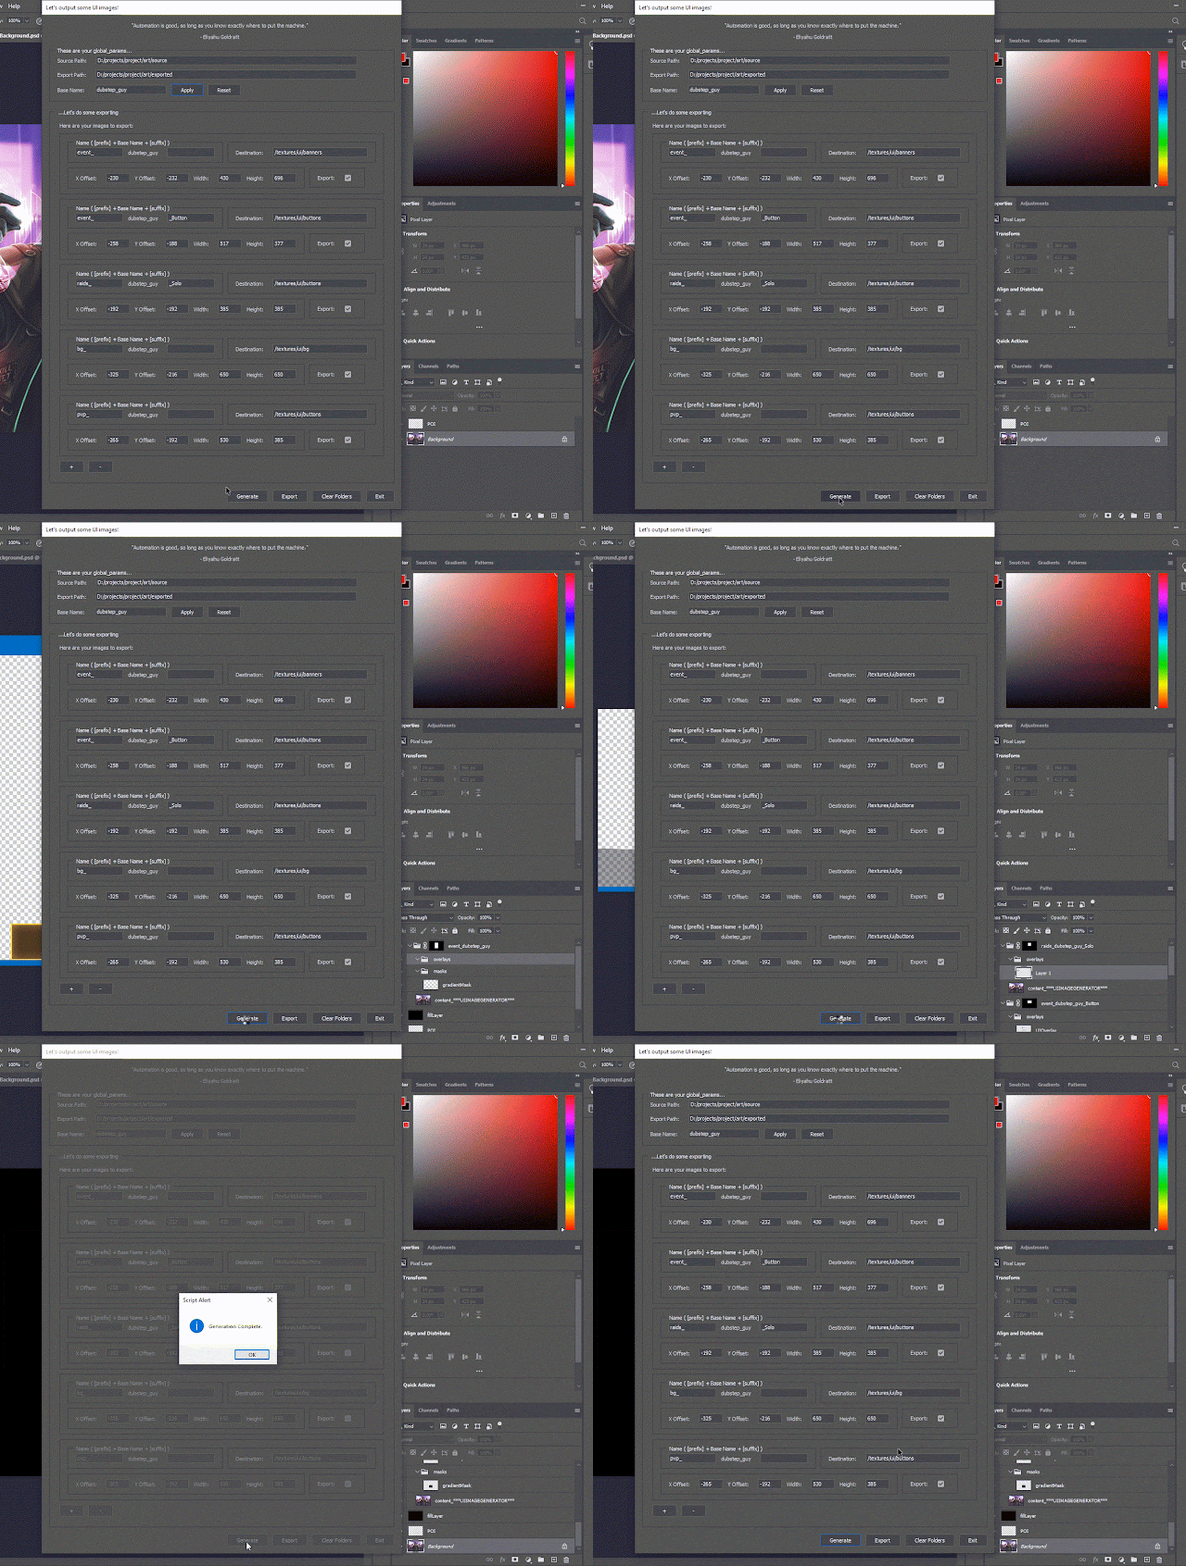 |
| Clicking generate creates a folder with a mask for each output profile. |
Once the export folders have been generated, the artist has the opportunity to edit the contents of the folder. If the image composition has to work with other UI elements, they can be added as overlays by the script. Masks can also be added, which would be exported with the UI image.
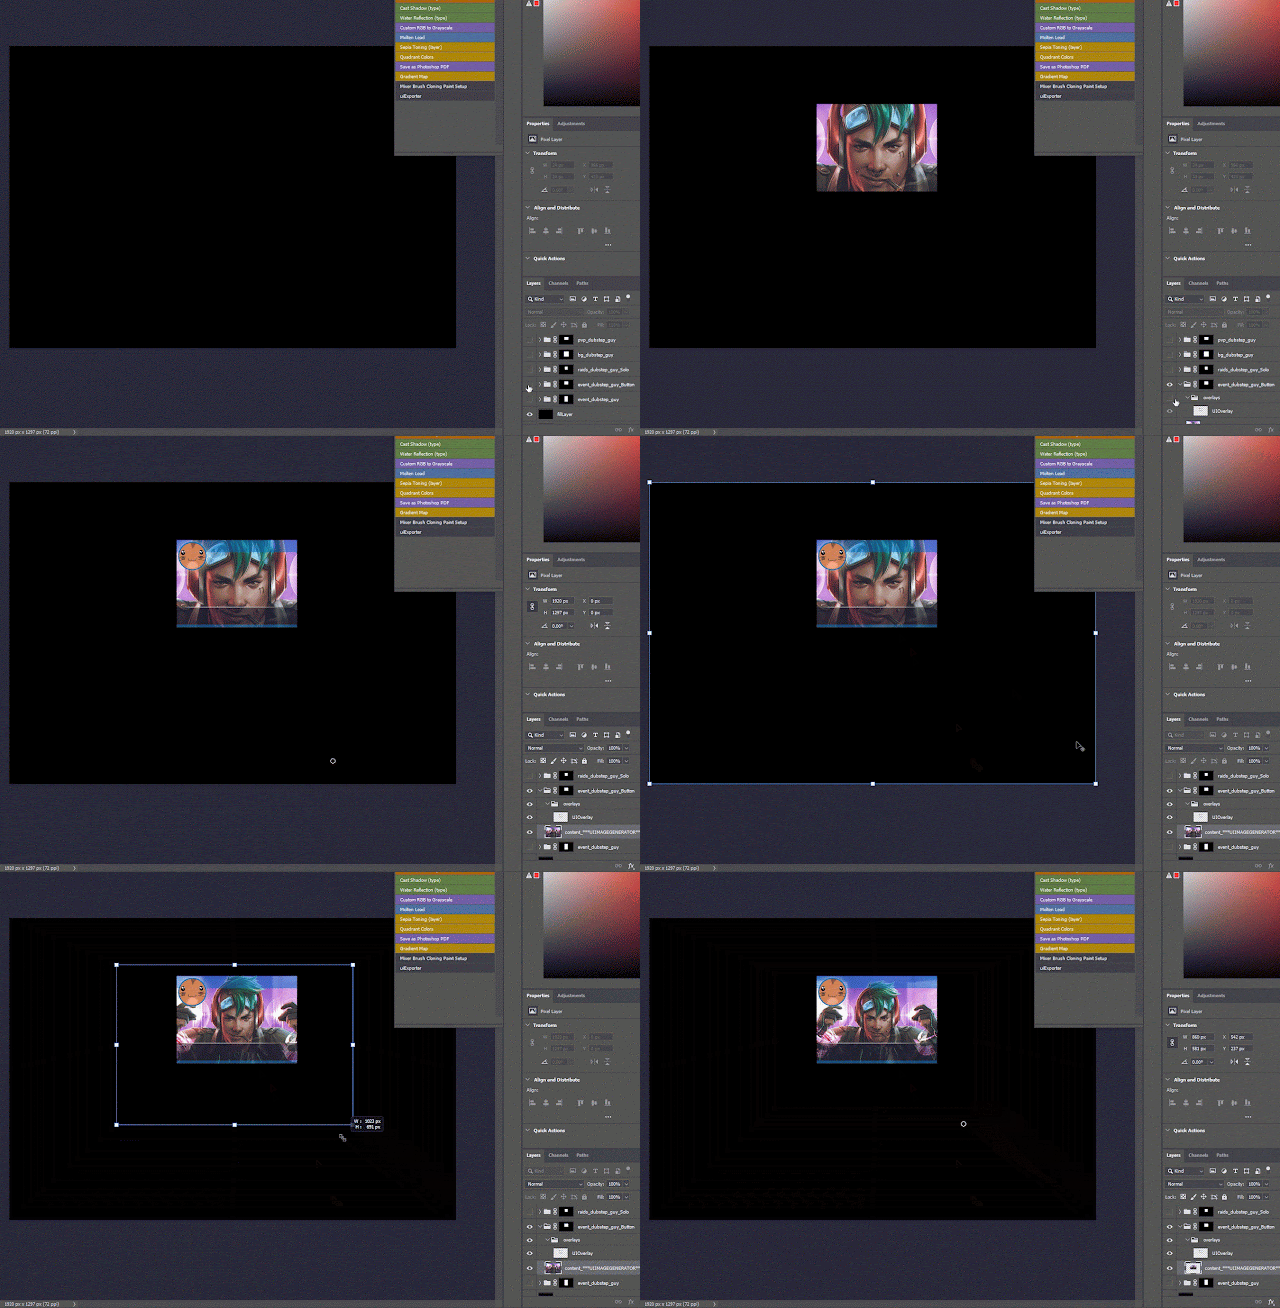 |
| The artist can edit the composition of the UI panel. Overlays can be added if the image will be under other UI elements. |
Clear folders will delete any folders created by the script so the artist can start fresh if needed. And exit exits the script.
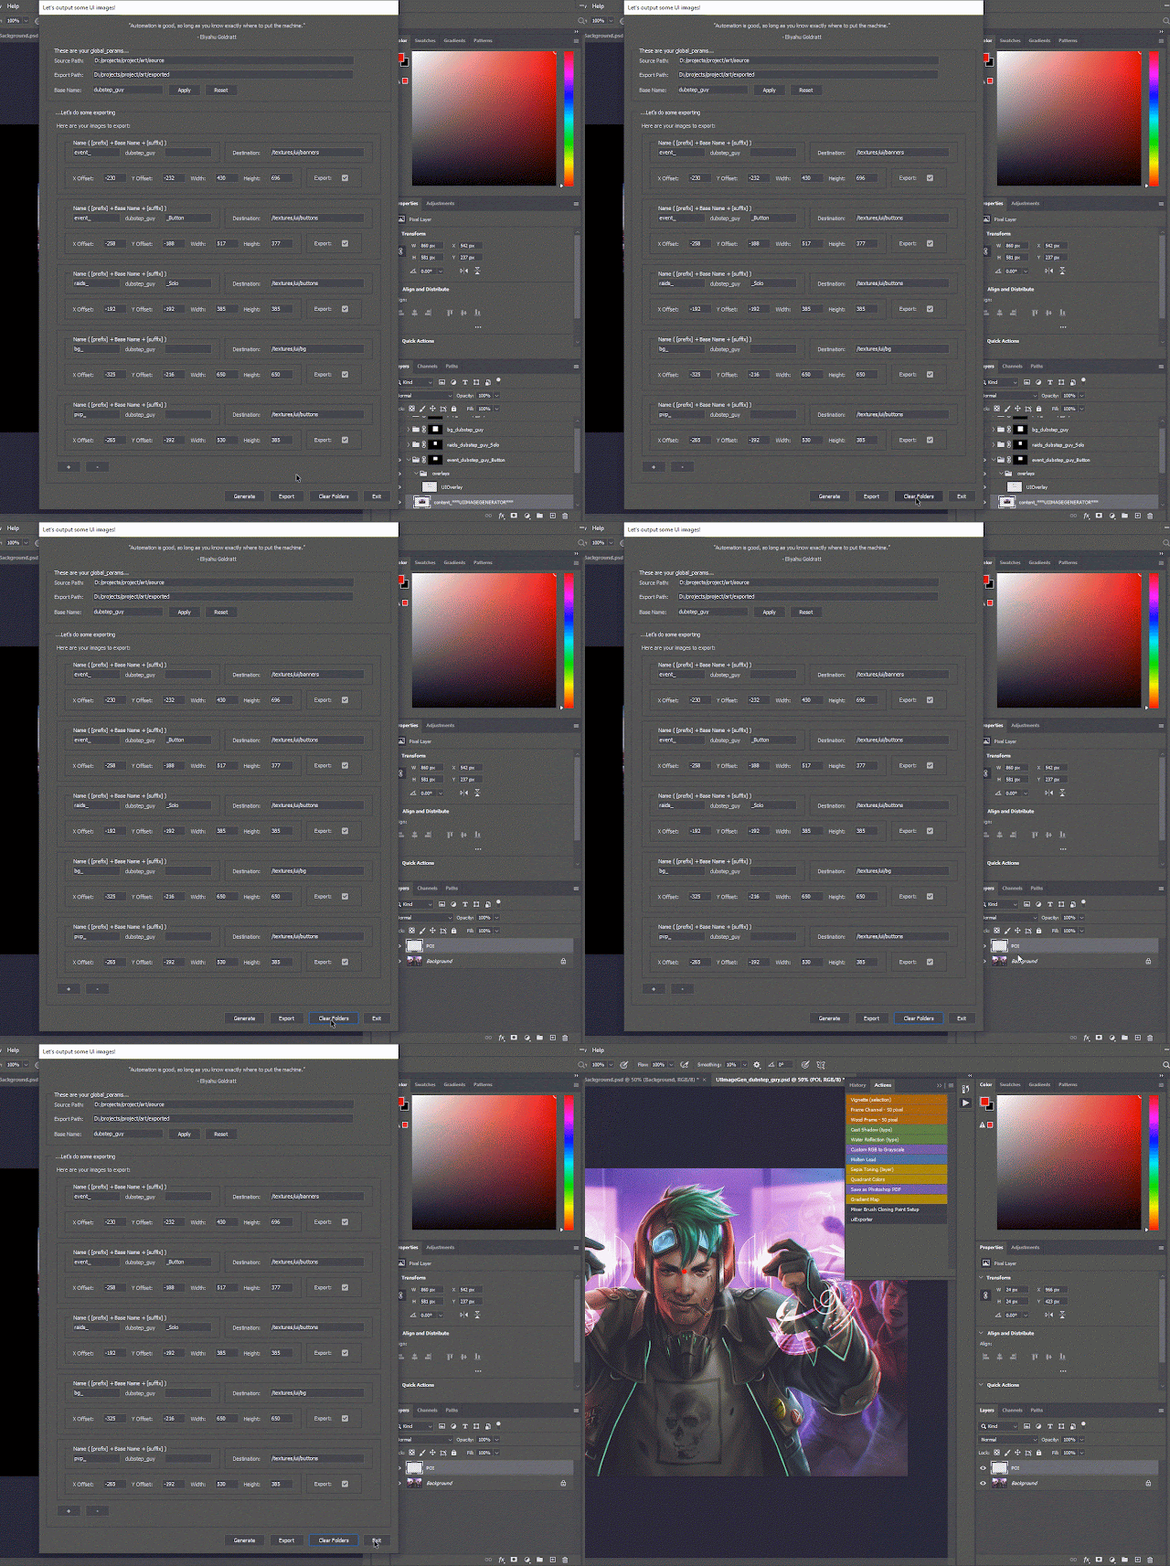 |
| The artist can clear all the folders the script generated if desired. |
Third time running, the final export
After evaluating the composition of each folder, the artist can fire up the script again to do the final export.
The export button will export each of the export folders once they are generated and tweaked by the artist. Any overlays that were left on will automatically be turned off. The resulting images will be converted to the next highest SPOT resolution.
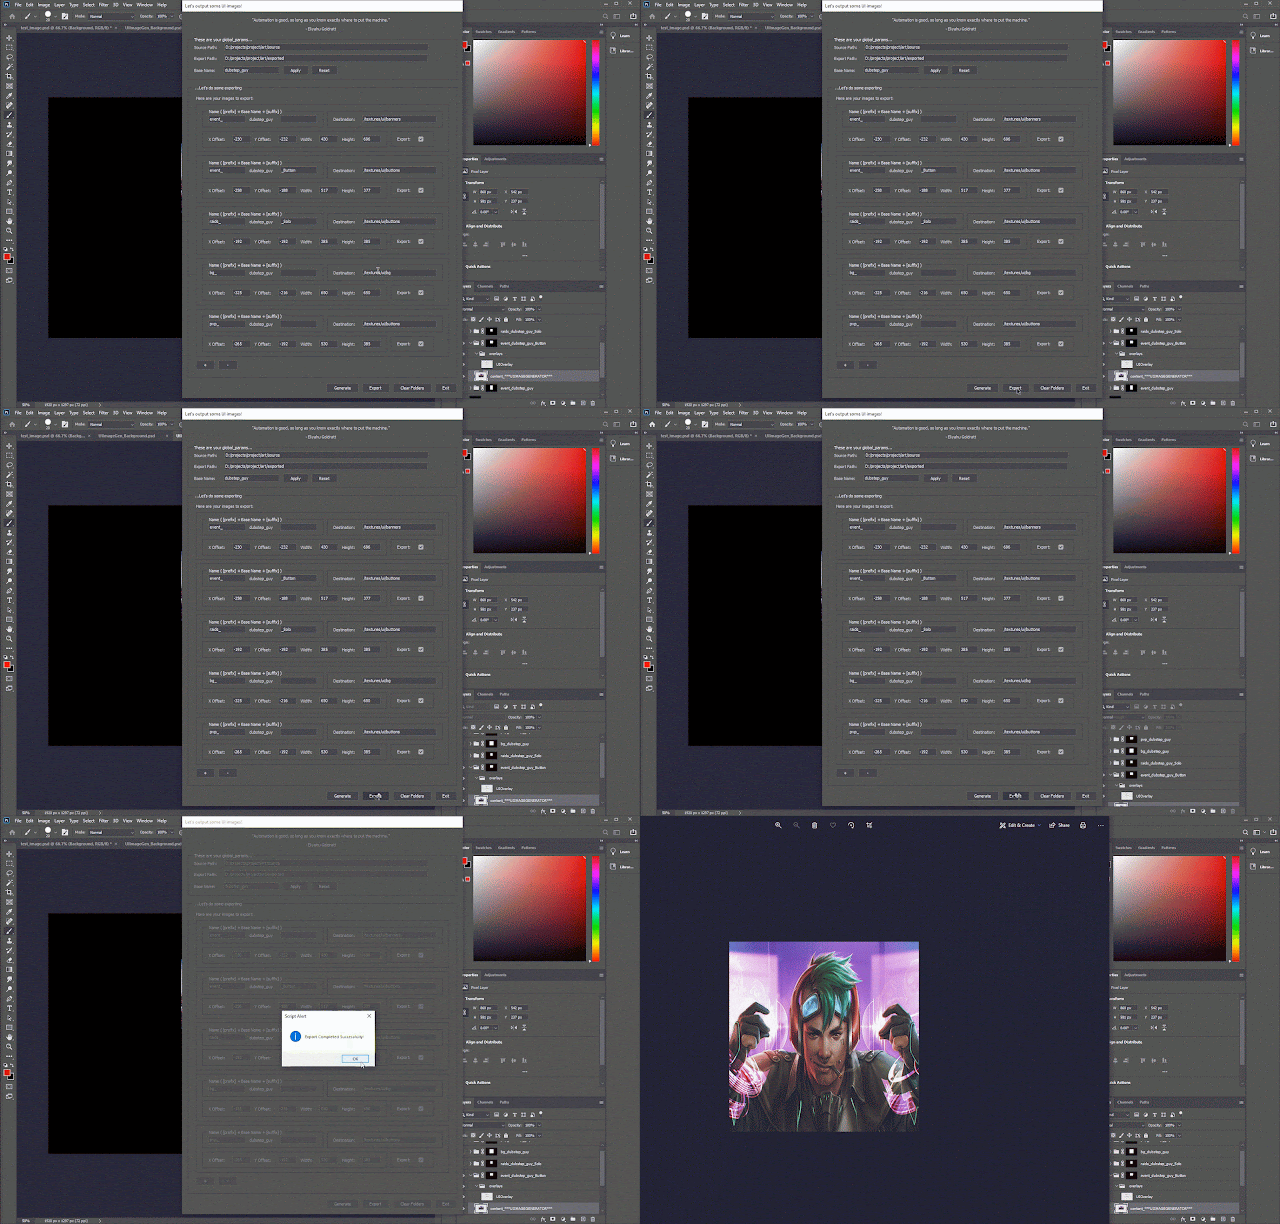 |
| The script will export any folder with the export checkbox enabled. |
At this point, all of the export targets are in the correct folders, and the script has created a photoshop document in the source art folder. The artist can save the changes they made. The script remembers any changes in export settings so when the script is opened while a previous psd is open, it will recall the previous settings.
The config file is in a format that is easily human readable, and of course, if it is edited by hand, those changes will be reflected next time the script loads the config.
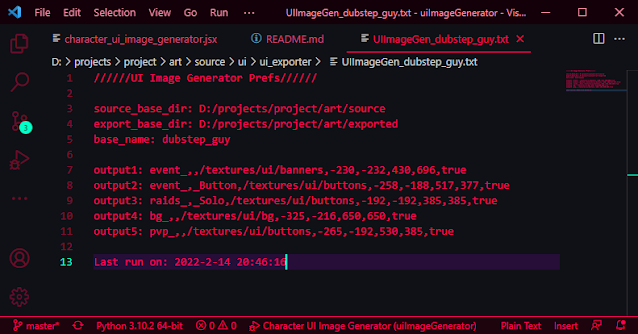 |
| The config is designed to be easy to read. |
Input and output
Firstly, I want to acknowledge profusely that the image I used to demonstrate the process is not mine. It was created by an artist named Matt Zeilinger. The image is from a character art tutorial, using a character from a game called Netrunner. The image came up in a google search looking for character art. The reason I chose this image is because it has the kind of composition that works well with the script. So, all artistic props to Matt Zeilinger.
So, from the excellent image by Matt Zeilinger, we have various outputs with different dimensions, compositions, and masks, all done in under ten minutes without digging through menus, having to recall dimensions for UI elements, or anything like that. The images are ready to be uploaded using any version control software.
Input
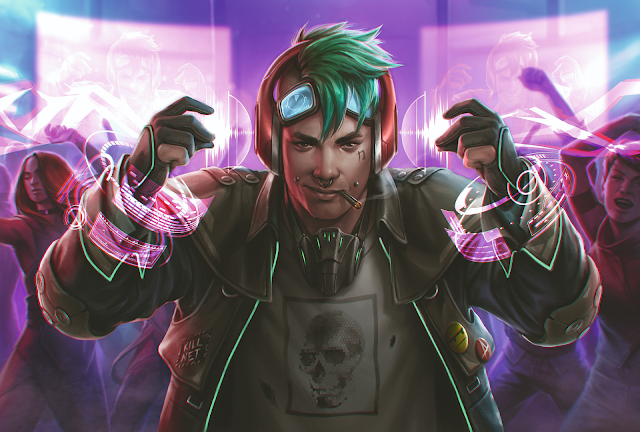 |
| The glorious character art by Matt Zeilinger. Used here for demo purposes only. |
Output
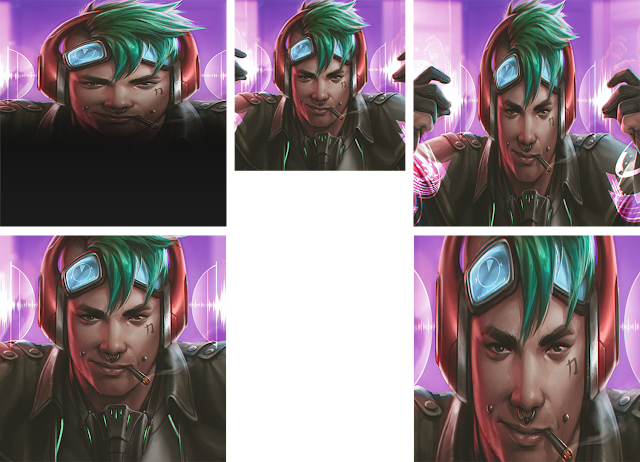 |
| The various output images. Notice the mask on the top left, scooped up by the script. |
Check out the script on my github project!
No comments:
Post a Comment